For most buyers, the listing photos are the first showing. People scroll, judge in a fraction of a second, and decide whether a home is worth a tour — all before they ever set foot inside. Great photos start long before the camera comes out, with thoughtful prep and staging in every room. This is the same checklist our team works through to get homes camera-ready, and you can download the full printable version at the bottom of this post.
Start with the property, not the camera
The best edit is the one you never have to make. Walk the home with fresh eyes and prep the space first — it saves hours in post and produces far better results than trying to fix a cluttered room in software later.
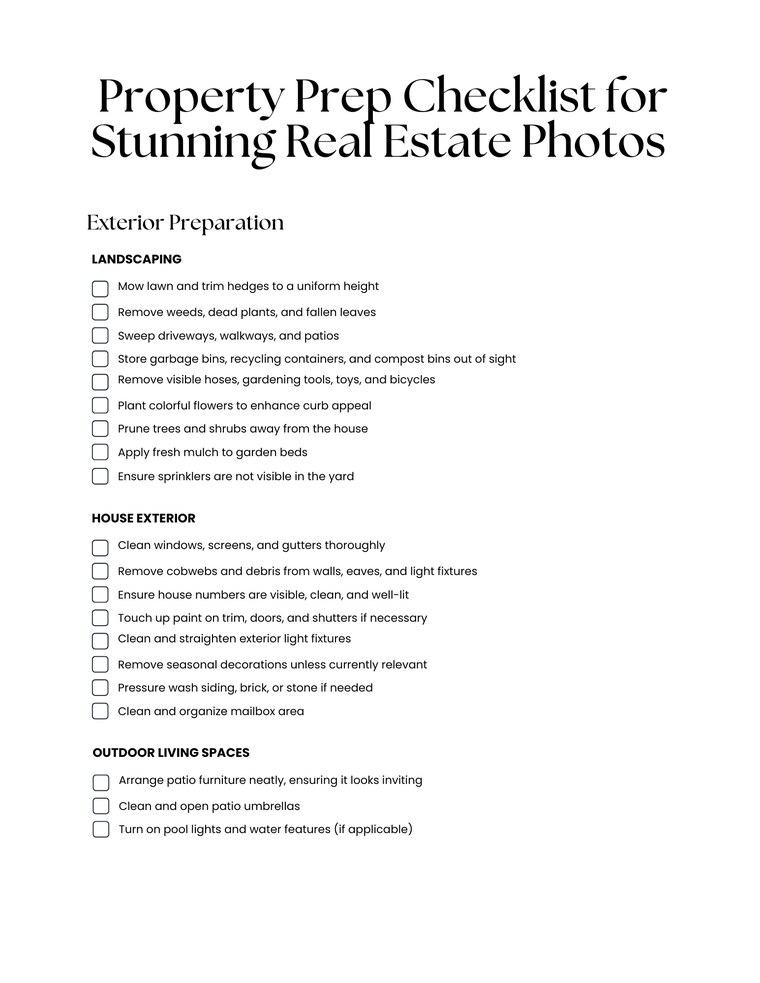
Outside, the goal is clean and uncluttered curb appeal: mow and edge the lawn, pull weeds, sweep driveways and walkways, and store garbage bins, hoses, tools, and toys out of frame. Move vehicles off the driveway and away from the front of the house, straighten patio furniture, open umbrellas, and switch on any water features. Inside, depersonalize and de-clutter every room: clear countertops, hide trash cans and laundry baskets, remove personal photos, and tuck away pet supplies.
High-impact prep, every time
- Turn on every light — overheads, lamps, and accent lighting — and replace any burnt-out or mismatched bulbs so color temperature stays consistent.
- Open all curtains and blinds to let natural light in, but turn off ceiling fans and TVs so they don't blur or glare.
- Make beds, fluff pillows, and straighten furniture — small touches that read instantly in a wide shot.
- Add a few warm details: fresh flowers, a bowl of fruit, neatly hung towels, a tidy place setting.
Stage each room to photograph well
Staging for the camera is a little different from staging for a walkthrough — the lens flattens space and exaggerates clutter. Go room by room:
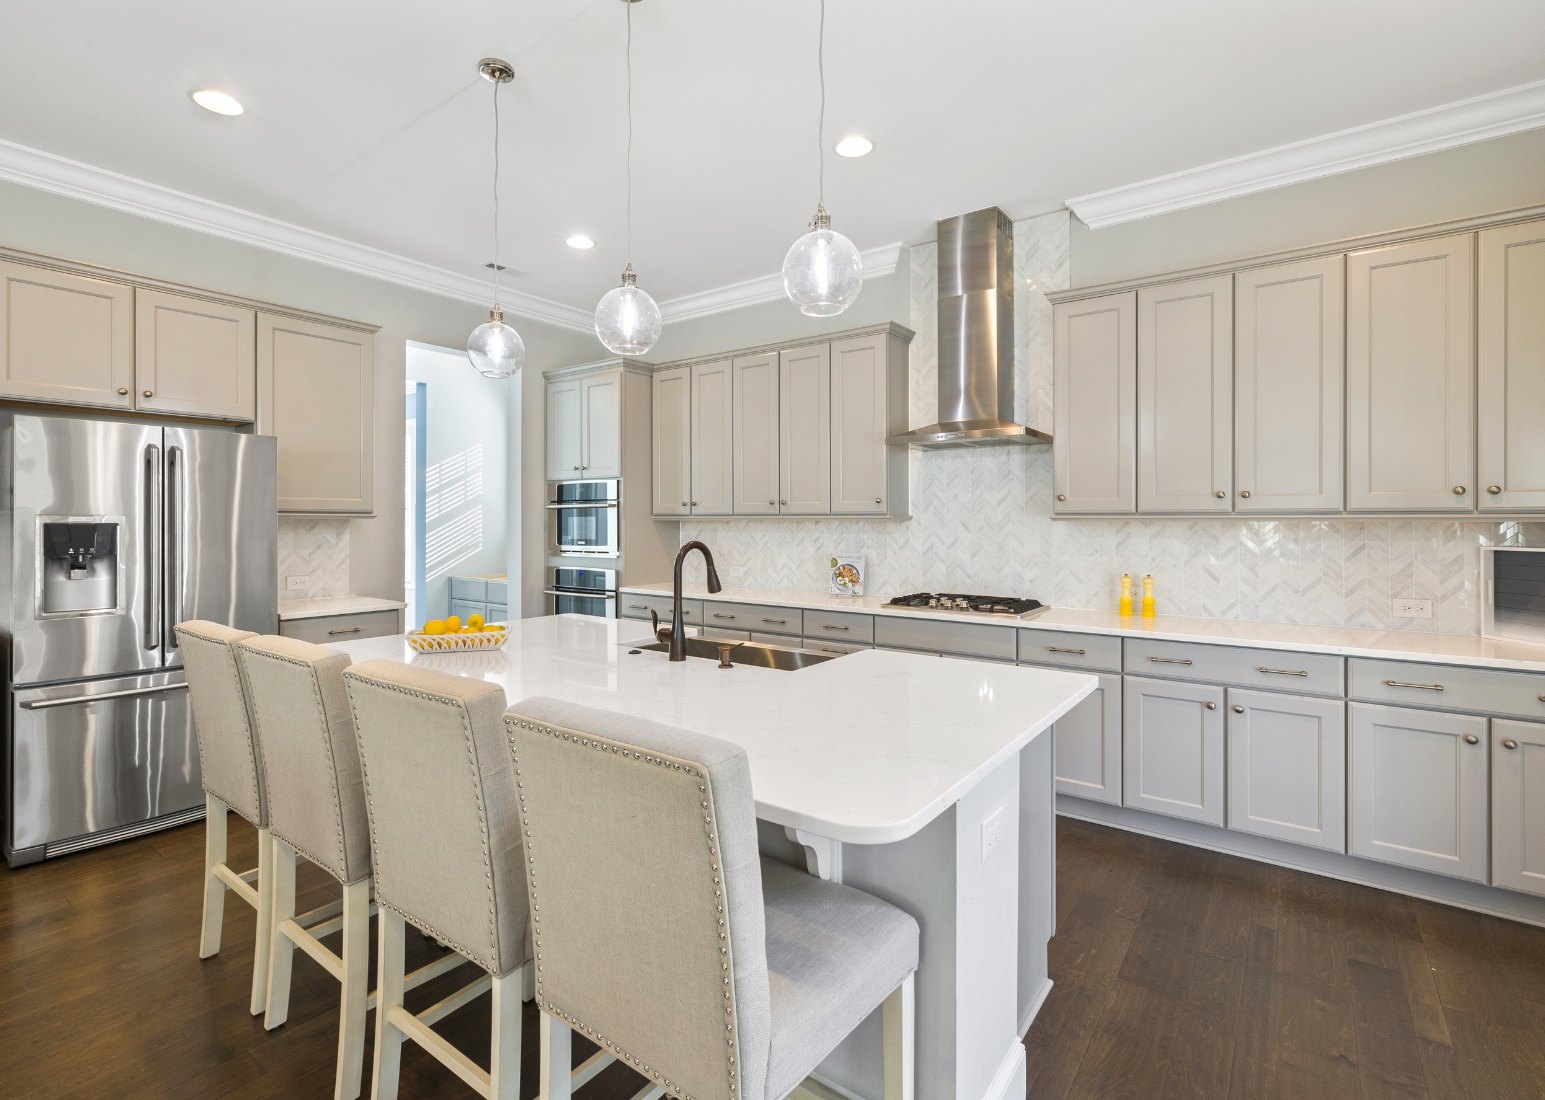
- Kitchen: clear countertops of small appliances, hide dish racks, empty the sink, and remove magnets and papers from the fridge. A bowl of fruit or fresh flowers adds life.
- Bathrooms: remove all toiletries, close toilet lids, hang fresh coordinating towels, remove bath mats, and polish mirrors and glass until they're streak-free.
- Bedrooms: make beds crisply, clear nightstands down to a lamp and maybe a book, close closet doors, and remove anything stored under the bed.
- Living areas: straighten furniture, remove remotes and magazines, hide cords, and center any rugs so they sit flat and square.
Dial in your camera settings
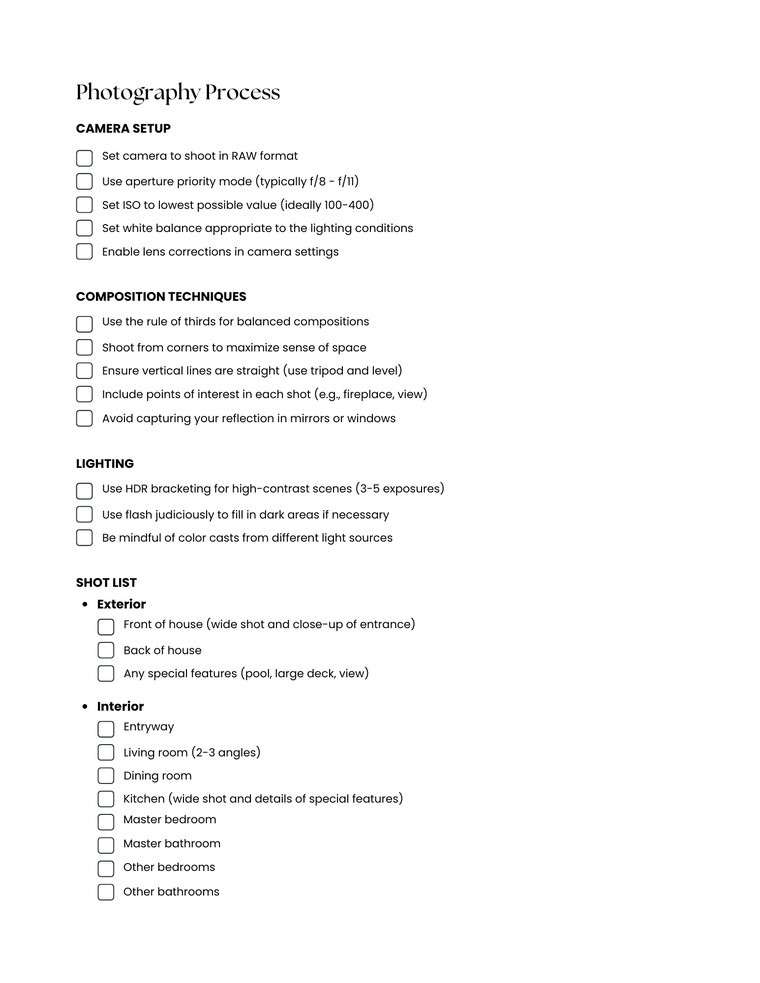
Once the home is ready, consistency comes from your settings. Shoot in RAW for maximum editing latitude, use aperture priority around f/8–f/11 for front-to-back sharpness, and keep ISO as low as the light allows (ideally 100–400) to minimize noise. Set white balance to match the room's lighting, and enable in-camera lens corrections.
For composition, a tripod is non-negotiable — it keeps vertical lines straight and lets you bracket exposures. Shoot from the corners of a room to maximize the sense of space, use the rule of thirds, and give each frame a clear point of interest like a fireplace or a view. In high-contrast rooms, bracket 3–5 exposures for HDR blending, and always check the corners of mirrors and windows so you don't catch your own reflection.
Edit for consistency, then deliver
In post, import your RAW files, back up the originals, and organize by room. Then work for a clean, consistent look across the whole set: adjust exposure and contrast, correct white balance, straighten verticals, crop for composition, remove minor distractions, and apply lens corrections. The goal is a gallery that feels like one cohesive home, not twenty different ones.
Export two versions — high-resolution JPEGs for print (300 dpi) and web-optimized images (around 2000px wide) for the MLS and listing sites — and name files systematically (for example, address_room_number.jpg) so they're easy to hand off. Finish with a quick quality-control pass and a final walk-through of the gallery before delivery.
Your free printable checklist
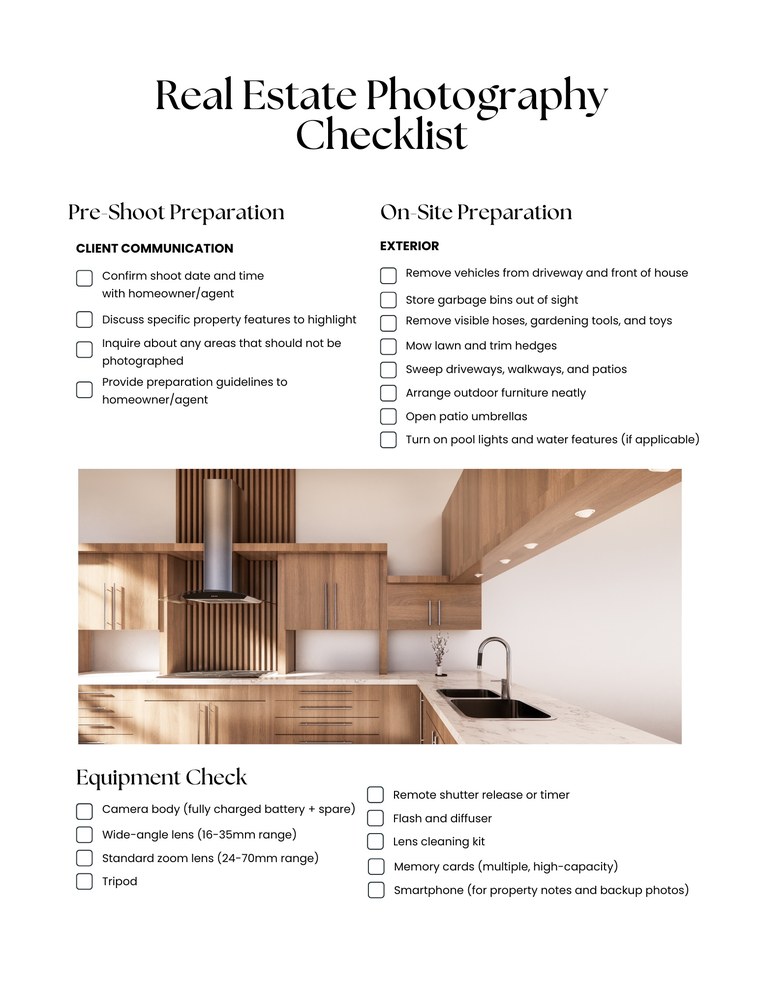
Want the whole thing in one place? The full 10-page checklist covers pre-shoot prep, a room-by-room staging guide, camera settings, a complete shot list, and post-processing steps — formatted to print and bring to every shoot.
Get the full checklist — free printable PDF
Drop your email and we'll unlock the complete 10-page Real Estate Photography Checklist. It downloads instantly, and we'll send a copy to your inbox.
We'll email you the PDF plus the occasional Mad River Homes update. Unsubscribe anytime.
Selling soon? Talk to Mad River Homes about getting your home market-ready →